How to create a WebHooks a beginners guide :) !
roman rose
Last Update 3 tahun yang lepas
In this example, I will show you how to create a basic Webhook, Ideal to follow if you have never made a Webhook before but not something I would use as a complete solution with Dashed AI.
Please check out this blog for a complete solution:
https://dashedai.tawk.help/article/how-to-set-up-a-complete-crm-integration-via-webhook
1. Create a new Zap in Zapier.com
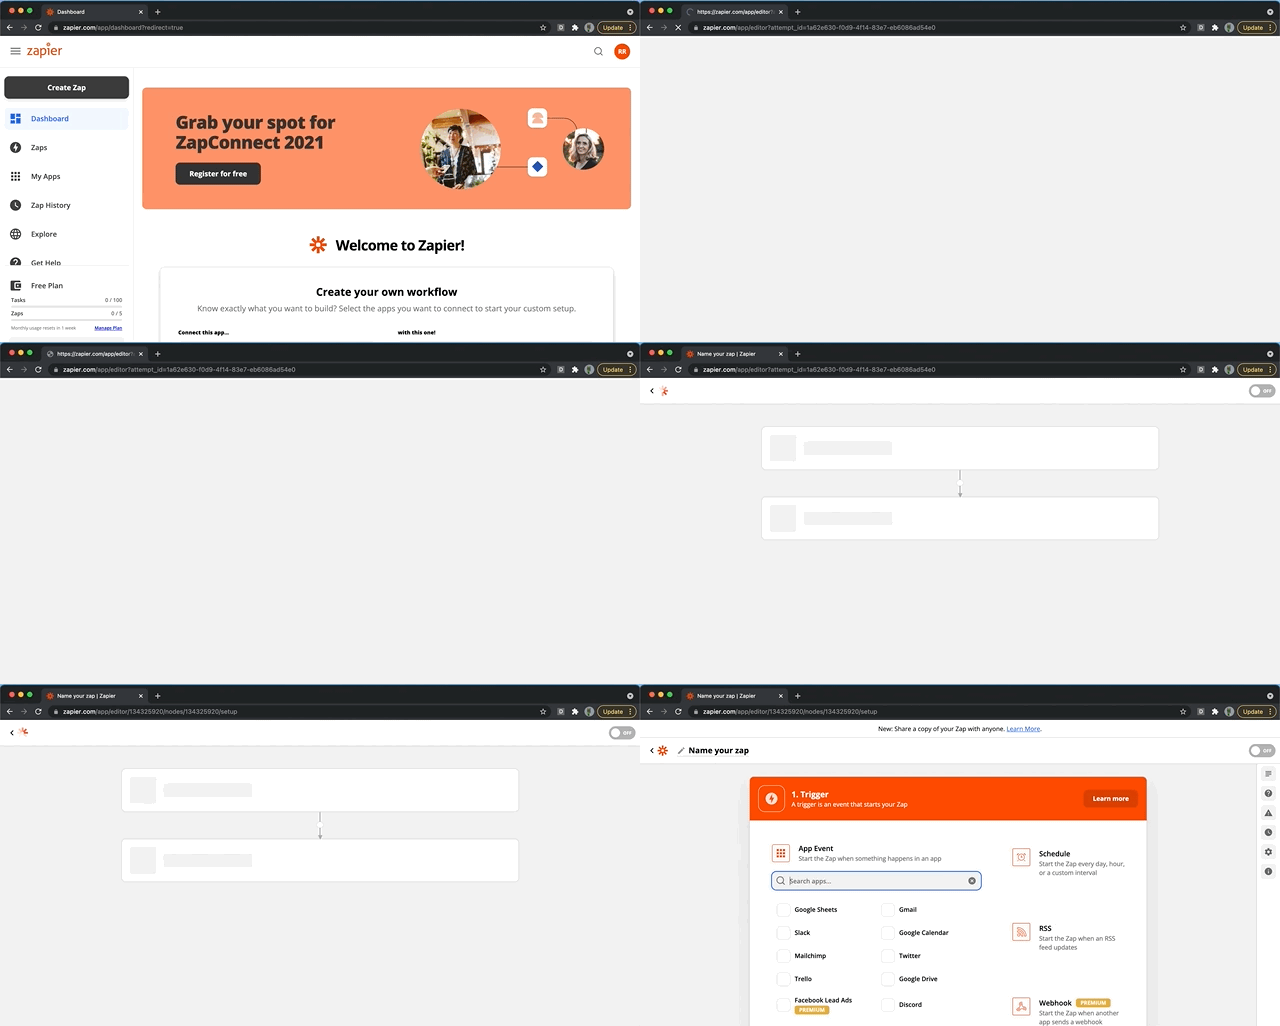
2. Create a Webhook Trigger
You can find this by navigating to the bottom right of the trigger box (it is called WebHook with a yellow premium sign next to it).
Once you click make sure you choose "catch hook" as the trigger event.
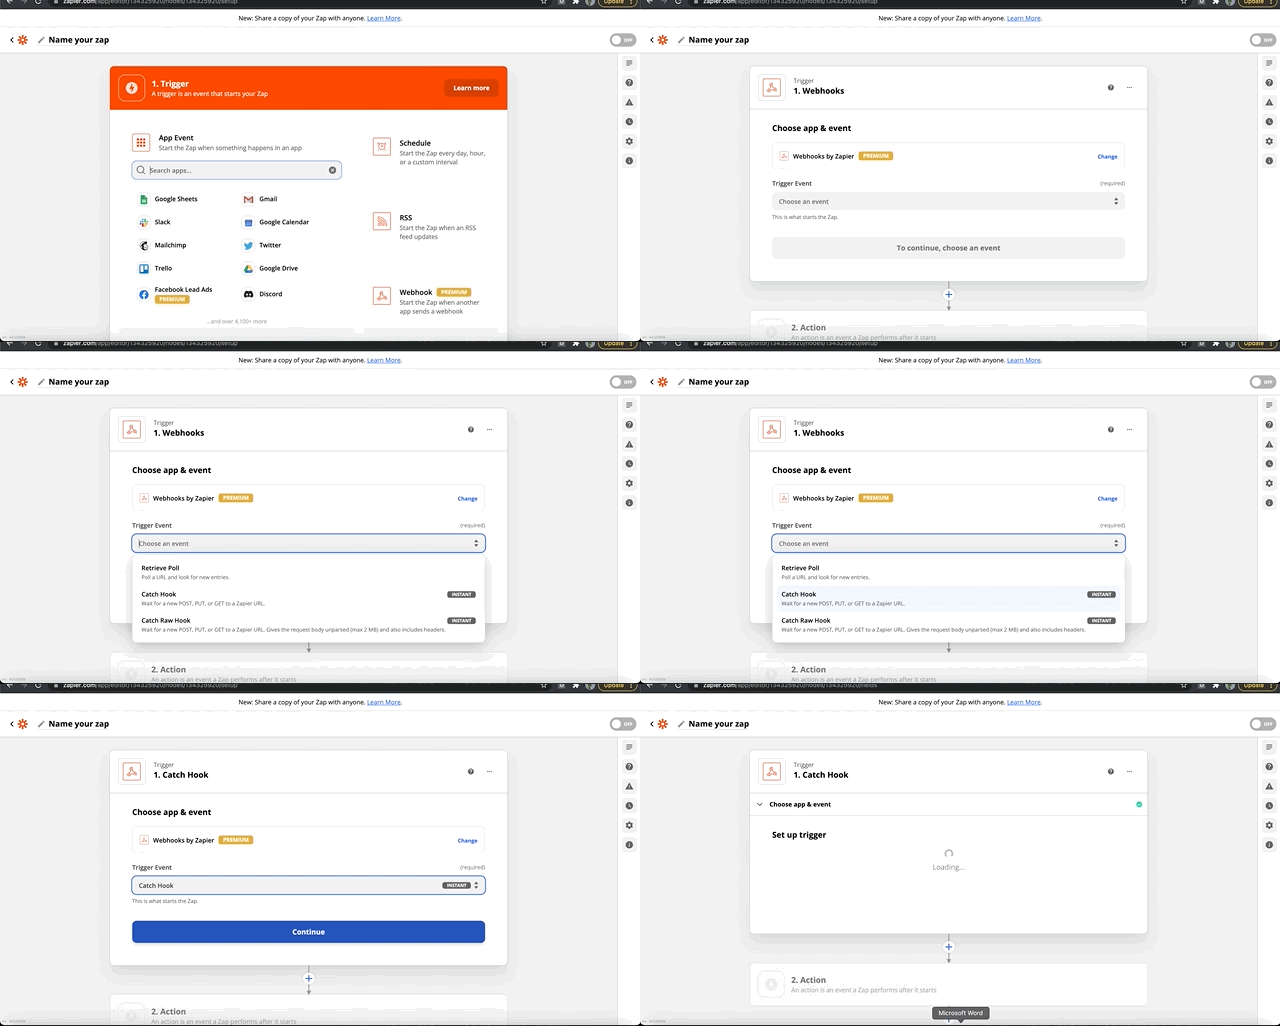
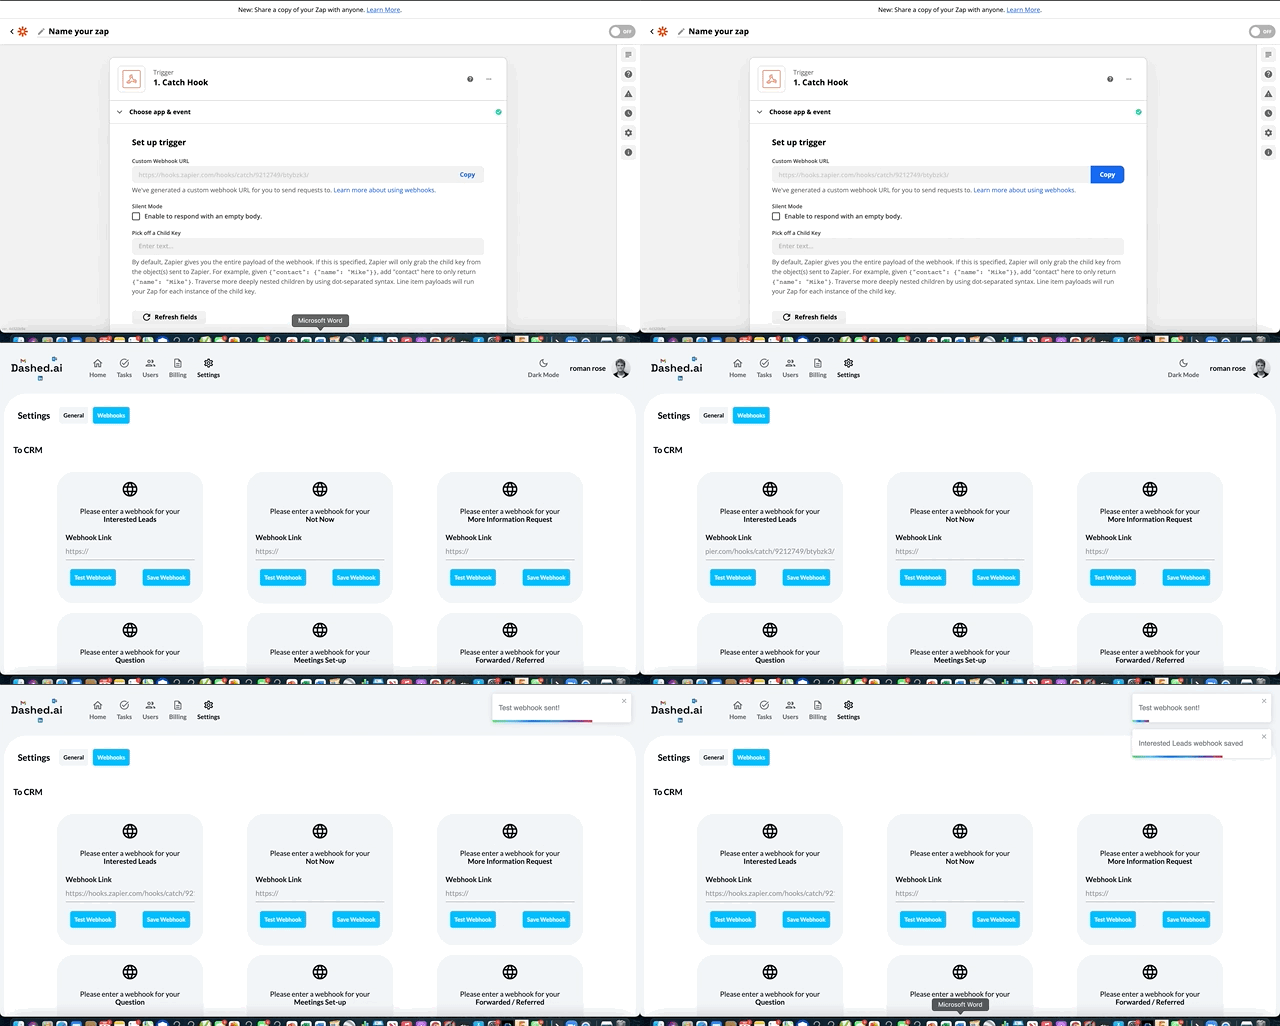
3. Copy and paste the Webhook URL in the settings -> Webhook section of Dashed.ai
Once you have copied and pasted the url into the box in dashed. Make sure you click test Webhook and save Webhook. A pop-up should appear in the top right hand corner confirming both those actions.
4. Head back to Zapier.com and test your connections
you will see that there are test fields with test data points which
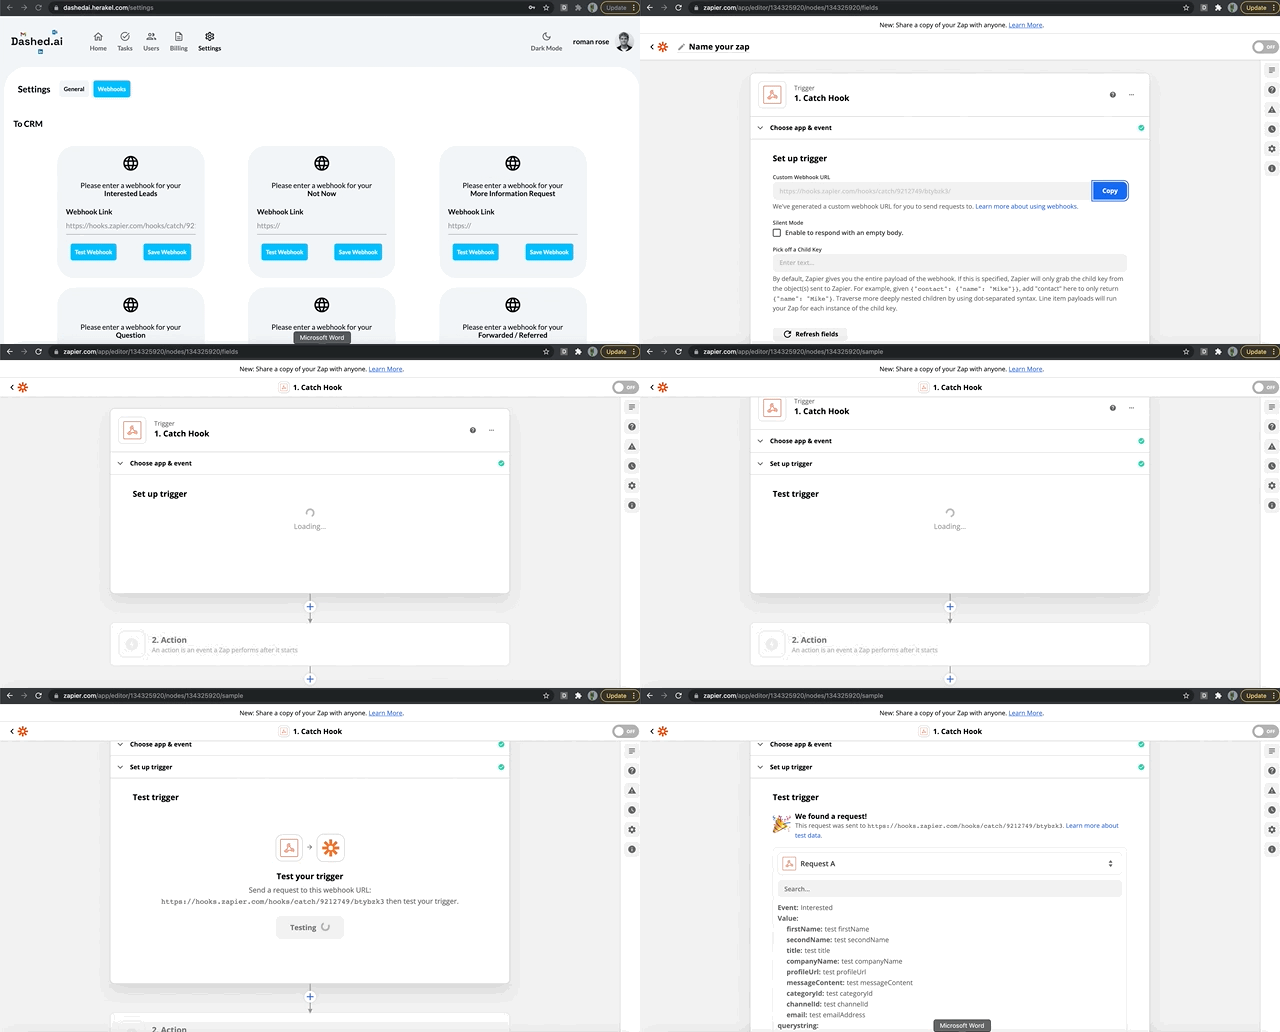
5. Test your trigger and move onto setting up an action
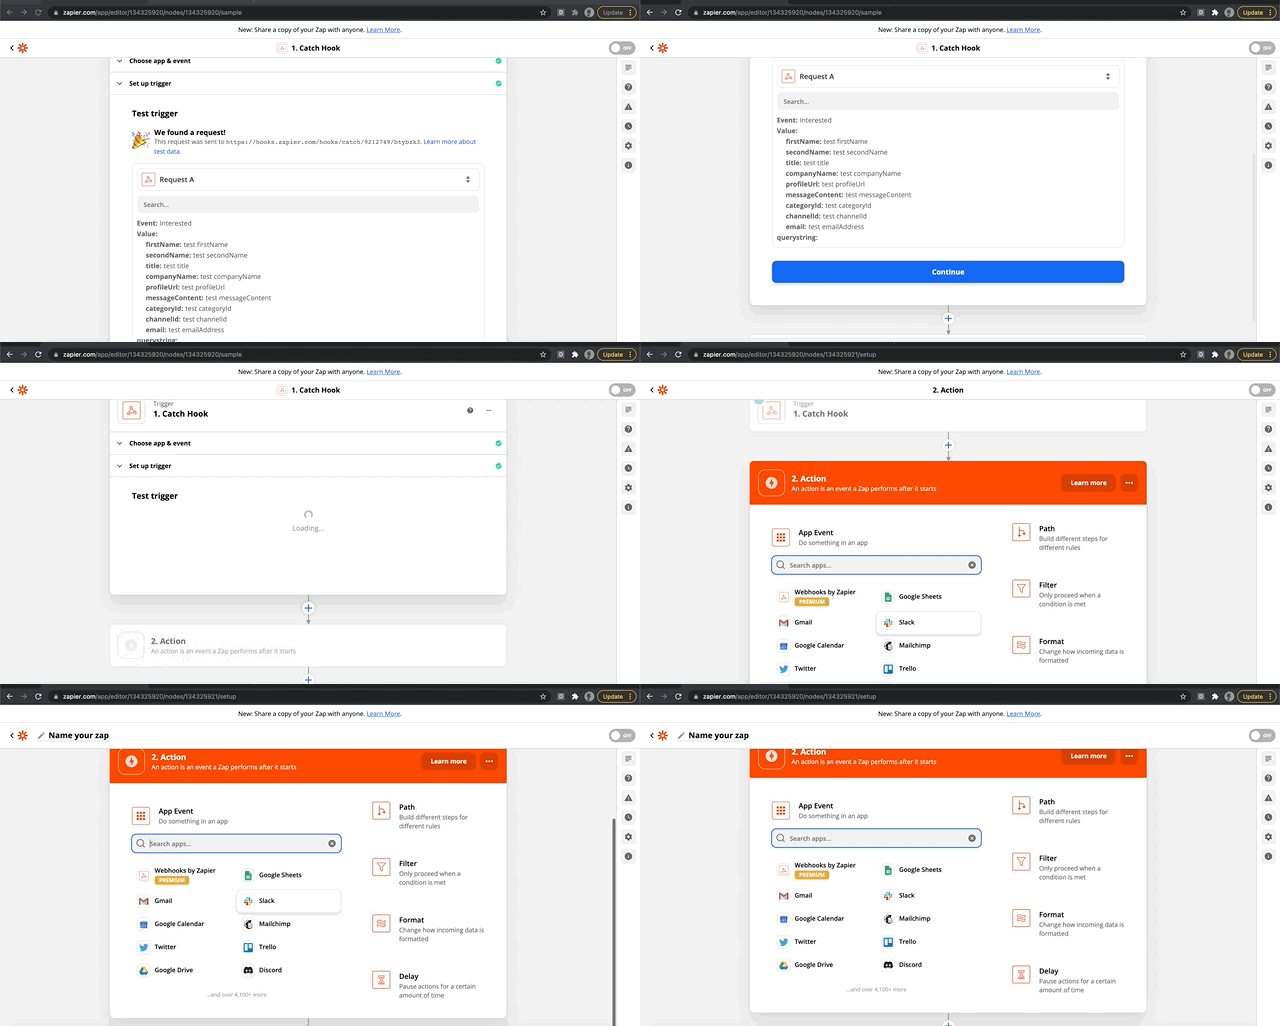
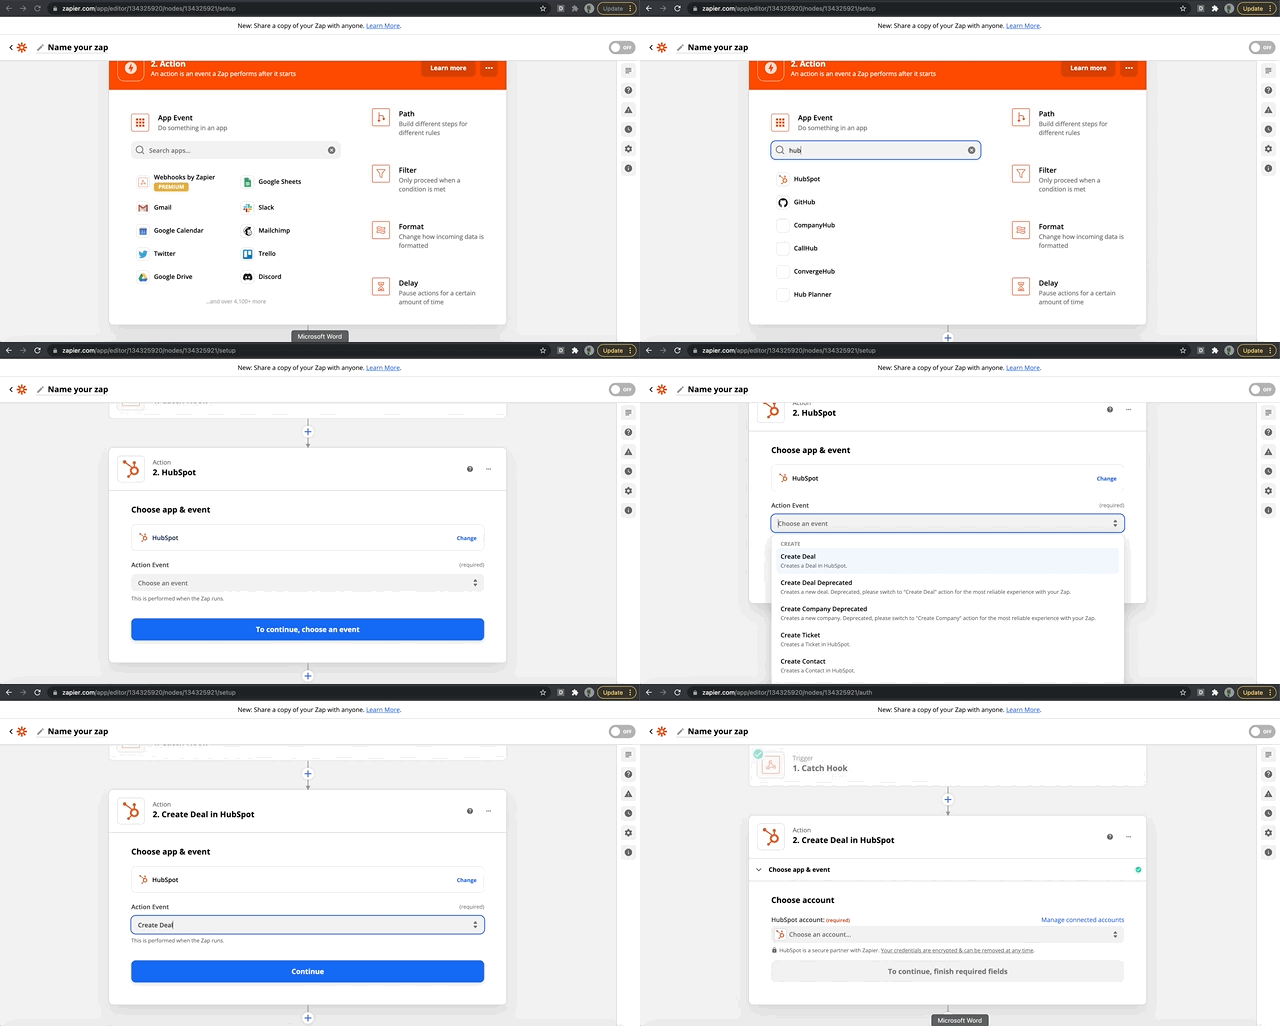
6. Search for your CRM and choose an action
In this scenario I wanted to create a new deal in Hubspot when someone expresses interest
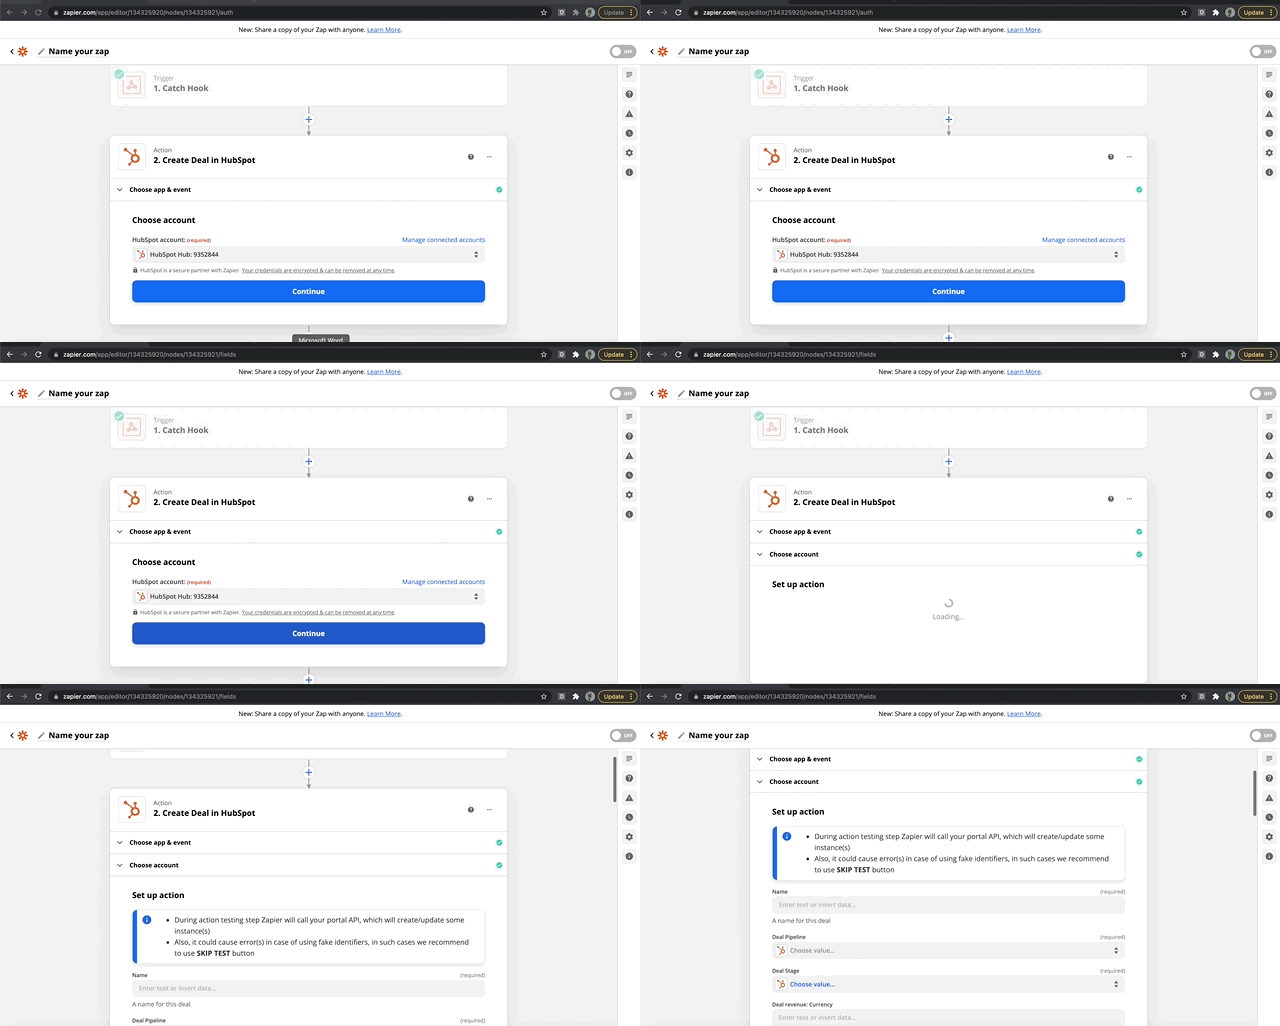
7. Connect your CRM account
in this case I connected my Hubspot.com account
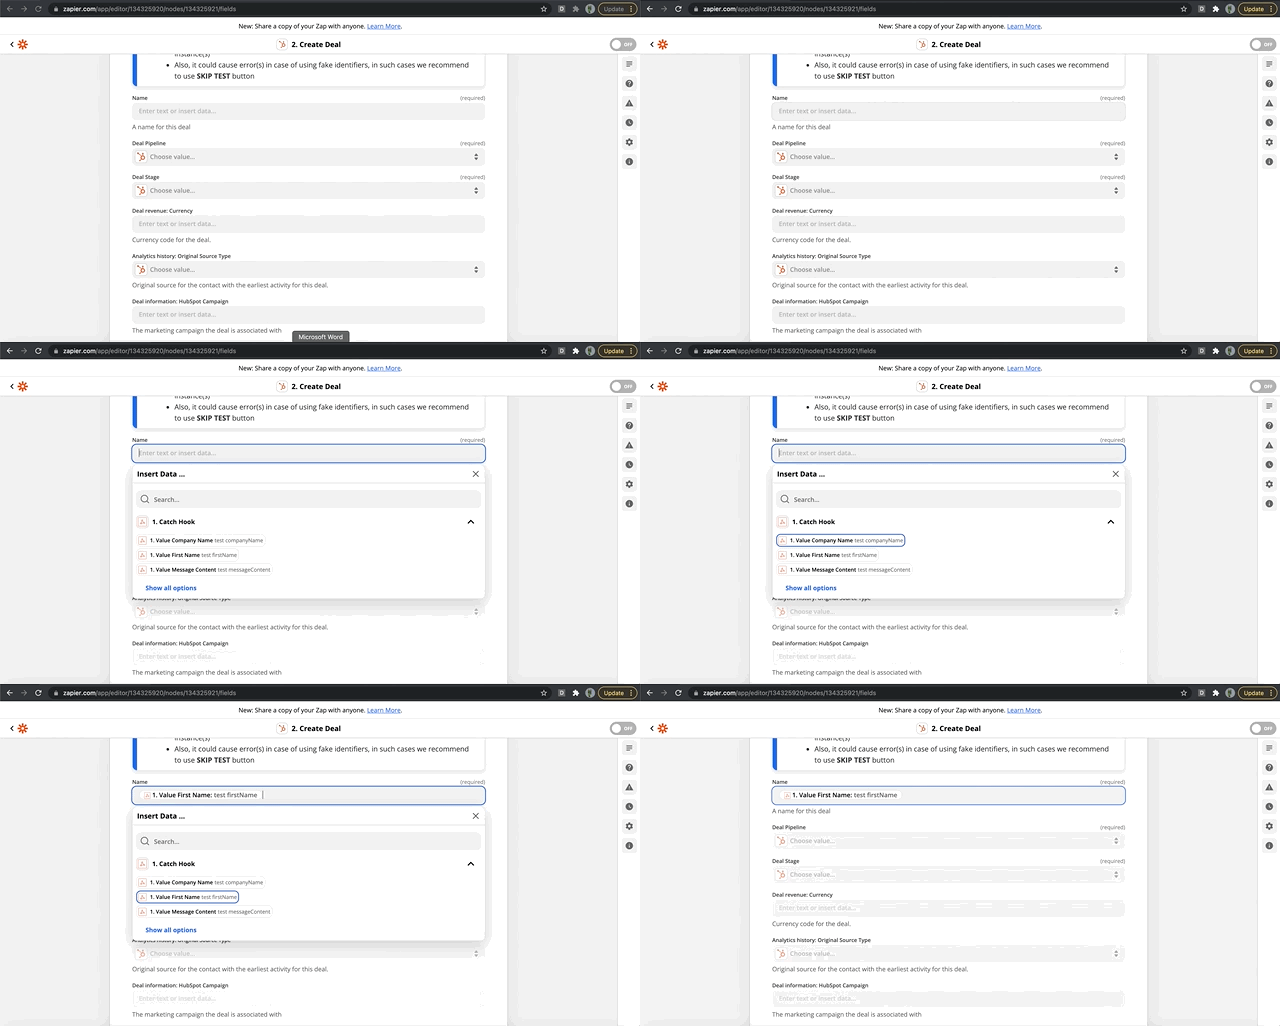
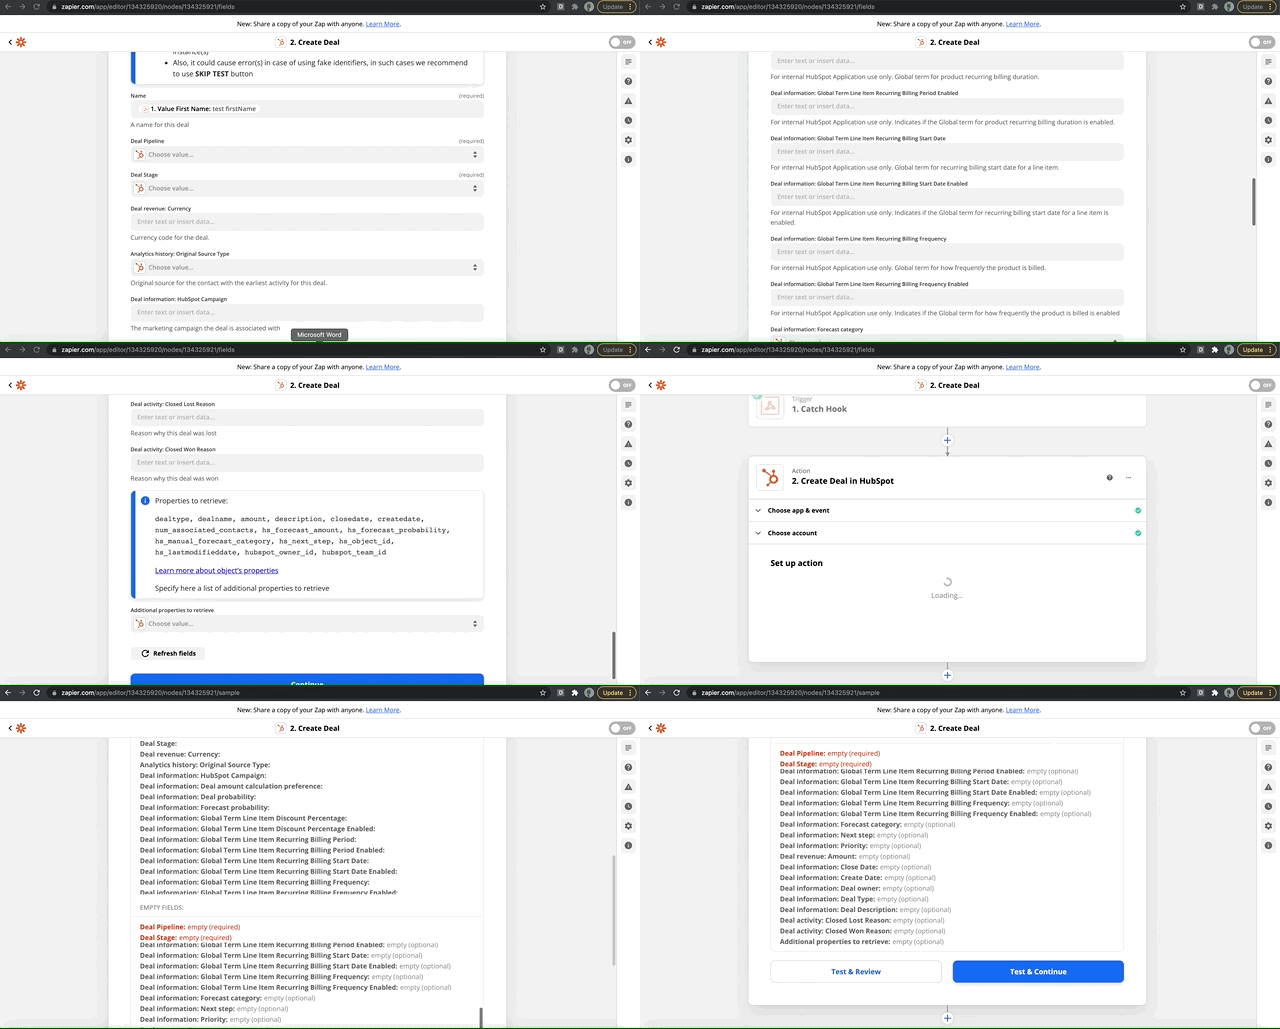
8. Map fields
This is an important step. Dashed sends the following data points about a lead:
1. firstName
2. secondName
3. title
4. companyName
5. profileUrl
6. messageContent
7. categoryId
8. channelId
9. email.
It's up to you to decide how you want to setup you deal stages with respective leads.
We have given you the freedom and flexibility to create a solution that works for your business.
For example: you can send leads interested in having a demo to a hot lead or meeting setup stage in your CRM and assign a certain success percentage.
You can send not now’s to a reach back out section.
You can send leads who have a question or more information request to a warm stage.
You could also create a zap to send not interested leads to a google sheet so that every month you can see if there is a correlation in titles or companies that are not interested so that you can refine your target customer/prospect lists.
The possibilities are endless.
9. Finally you want to test & continue and turn on your Zap
If you have done everything correctly you will see a test deal with the test fields created in your CRM
If you need any help along the way please reach out using the live chat. We love setting up Zaps, just kidding, but we have probably set up over 1000.
The Dashed Team

